Return to the Oase AquaOxy Air Pump product page
Oase AquaOxy Air Pump Information
The AquaOxy has two air adjusters located directly on the front of the unit. It allows you to control how much air is needed to the pond at a certain time. This is most useful when you are sat in the garden and want to be able to see all of the water's surface with no disturbance, allowing you to see all your fish and wildlife. The AquaOxy with its low voltage and weatherproof casing means that it is perfectly safe to be left outside in the elements, giving you piece of mind that come winter or summer your AquaOxy will be doing it's job. Oase have integrated non return valves (these valves stop water leaking back to the pump) so for a raised pond the air pump can be placed on the floor even if it is below the water surface, but not underwater!*
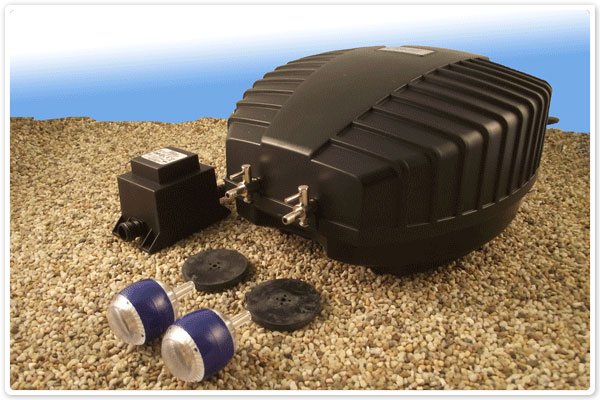
In the above picture you can see all the component parts that come in the box with your AquaOxy air pump. In the top left of this picture, there is the transformer, this is fully weatherproof so it can sit outside in rain or shine. It will connect to the power lead with a simple screw fitting.
Also shown in the picture there are two spare black diaphragms, it will be explained how to change these later on. The diaphragms can after time wear or damage through continuous use. It's advisable to change these every year, an air pump is such a vital piece of equipment that you simply can not afford for it to be failing if you are away.
You can also see the two air stones that are supplied, these simply push fit into the black air tubing supplied with the pump. As explained previously there are non return valves fitted within the housing of this pump so you don't need to add more! On the front of your Aquaoxy there are two metal air control taps, these will allow you to add more or less air to either airstone. Just push the black air tubing with the air stones on the over end other the metal taps to connect it all together.
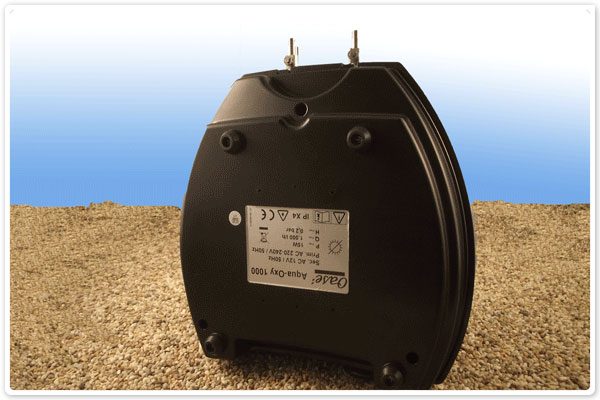
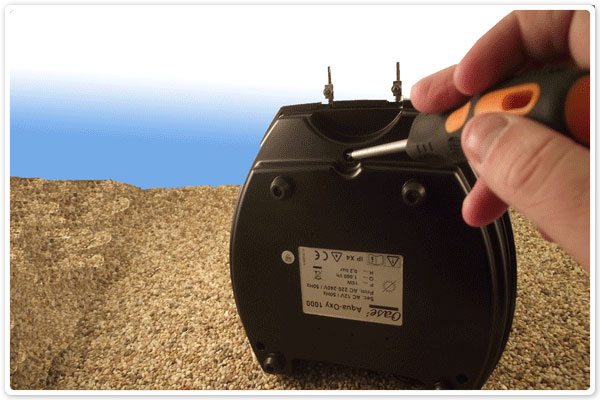
To get inside your Aquaoxy is really simple, there are three screws that are all require a phillips head screwdriver. Untighten and remove all of these. There is one screw at the top, and one in the bottom right corner and one in the bottom left corner. Once these have been removed the top housing will simply lift away, put the screws to one side and carry on to the next stage.
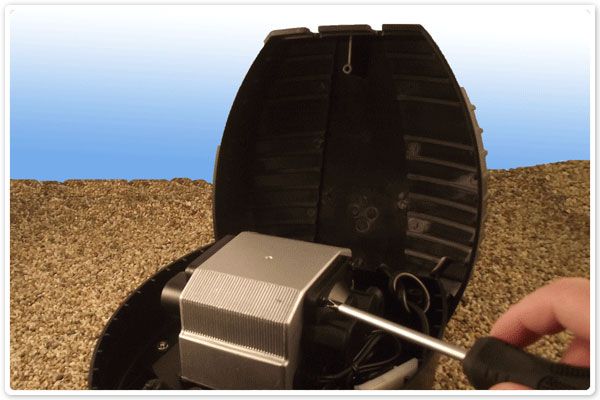
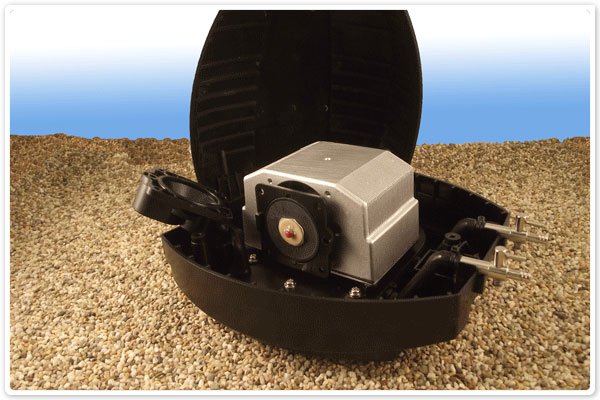
Once inside the Oase Aquaoxy air pump, you will see the metal motor, and attatched to either side of the motor you have the diaphragms housing. This is held into place by screws, which are conveniently phillips head screws. In the manufactures guidelines it suggests to remove the full motor from the base plate, then remove the screws. I find this can make things more difficult and complicated in all honesty. So i would suggest to just loosen the screws and remove the diaphragm cover, then pull away from the silicone air tubing and put this to a side and then move on.
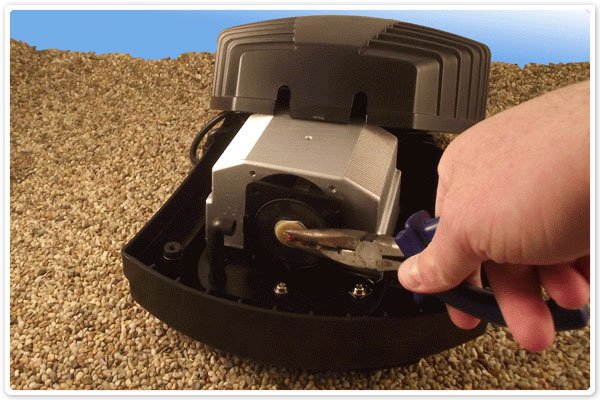
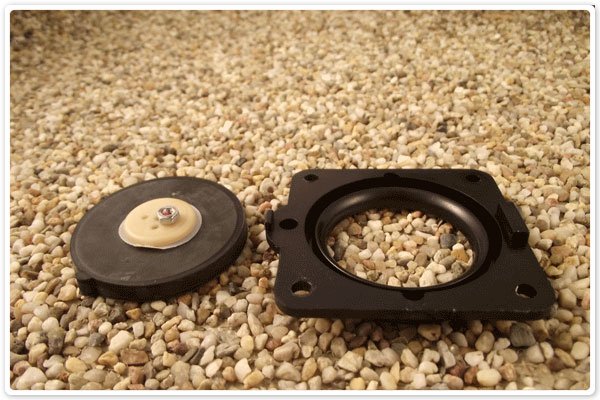
To remove the diaphragms from the main motor of the Aquaoxy air pump you are going to need to long nose pliers. You will see a locking nut, this needs to be removed but first it has a red sealant on, just pick this away with the pliers. Once you have removed the locking nut the diaphragm will simply pull out and you will be able to change this with one the spares and then repeat the process and fit the unit all back together again.

